Bucardo is an asynchronous PostgreSQL replication system, allowing for multi-source, multi-target operations. It was developed at Backcountry by Jon Jensen and Greg Sabino Mullane of End Point Corporation, and is now in use at many other organizations. Bucardo is free and open source software released under the BSD license.
Bucardo requires a database to install the main bucardo schema on. This database must be Postgres version 8.1 or higher, and must have both the languages PL/pgSQL and PL/PerlU available. In addition, the install script requires installation as a superuser: creating a new user named ‘bucardo’ for this purpose is highly recommended.
In addition, the Bucardo daemon requires a Unix-like system. It has primarily been tested on Linux variants and macOS, but it should work on FreeBSD, OpenBSD, NetBSD, Solaris, and other similar systems. Bucardo will not currently work on Windows. However, you can have a Bucardo daemon on a Linux server that replicates between two Windows PostgreSQL servers.
To perform multi-master replication, make sure these program already installed :
- bucardo-5.6
- postgresql13
for more information about installation process on bucardo, you can check here.
now in this case, we want to have two server running as a master, with already data on vb1, and we want to duplicate that data to the second master, here are the environment that we will be used :
vb1:1st_oracle:192.168.100.94, dbname:master1
vb2:2st_oracle:192.168.100.97, dbname:slave1>>master2
make sure both server can connect to each other, for testing only we can set this parameter.
on postgresql.conf
listen_addresses = ‘*’edit pg_hba on vb1 and vb2
host    all             all             192.168.100.94/32       trust
host    all             all             192.168.100.97/32       trust
allow postgres & other server through firewall (as root)
# firewall-cmd --add-service=postgresql --permanenton vb 1
# firewall-cmd --zone=public --add-source=192.168.100.97/32on vb 2
# firewall-cmd --zone=public --add-source=192.168.100.94/32opening port through firewall
# firewall-cmd --zone=public --add-port=5435/tcp --permanent
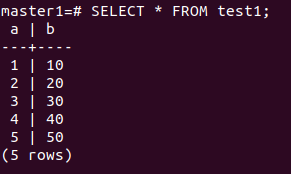
# firewall-cmd --reloadon master1 database there is already one table (test1) which have two column, column a as integer PRIMARY KEY and b as integer. test1 table also have 5 rows dummy data as follow:
on master2 we must create table same as master1, later on bucardo will start copying data from 1 to 2, we want test1 table being replicate in master2. To achieve this goal we will have two phase here, phase 1 for copying all of the data, and phase 2 for change vb2 from slave to master2.
PHASE 1: Copying Data
on this example, we will have vb1 as master1 and vb2 as slave1, the main goal of this process is to copying all the data from vb1 to vb2, or you can say copying data from server one to server two
from here, all of the command will only be executed on master1.
add the databases
Bucardo needs to know about each database it needs to talk to. The bucardo program does this with the add database option.
# bucardo add db <name> [options]in this case, we will add master1 and slave1 databases
# bucardo --dbport=5435 add database master_1 dbname=master1 host=192.168.100.94 port=5435
# bucardo --dbport=5435 add database slave_1 dbname=slave1 host=192.168.100.97 port=5435
if you wonder what is –dbport for, it is because on this case we don’t run database server on default port, instead we run on port 5435.
add the tables
Bucardo also needs to know about any tables that it may be called on to replicate. (Adding tables by the add table command does not actually start replicating them.). for adding just one table you can use:
# bucardo add table <tablename> db=dbnameBut in this case, we’re going to use the handy add all tables feature. Tables are grouped together inside of Bucardo into relgroups, so we’ll also place the newly added tables into a named relgroup.
# bucardo --dbport=5435 add all tables db=master_1 --relgroup=relgroup2 --verbose
add database group
The add dbgroup command creates a database group and optionally adds one or more databases to it.
# bucardo add dbgroup <name> [optional list of databases]The list of databases is optional, and can include the type of role as well. By default, the first database given is set to
a source role, and the others are set to a target role. The role can be specified by adding a colon and then the role name afterwards. Thus, this command will set both server as source role.
bucardo --dbport=5435 add dbgroup group2 master_1:source slave_1:target
The roles are “source”, “target”, or “fullcopy”. The data is going to flow from the “source” database to the “target” or “fullcopy” database.
add the sync
A sync is a named replication event. Each sync has a source relgroup. To add a sync:
# bucardo add sync <name> dbgroup=<dbgroupname> relgroup=<relgroup>for example:
# bucardo --dbport=5435 add sync sync2 relgroup=relgroup2 dbs=group2 onetimecopy=1
onetimecopy=1, this mean always perform full copy
start bucardo
The final step is to start the Bucardo service, this will initiate replication and copying all data from master1 to slave1, this command must be run as a root:
# bucardo --dbport=5435 start
the replication is now running. if we check table test1 on vb2 (slave1), all of the data already being copied. The next step we will make slave1 to become master2.
PHASE 2: Modify Slave to Become Master2
stop bucardo service
before we register slave to as a second master, we must stop bucardo, to do this run this simple command:
# bucardo --dbport=5435 stop
remove bucardo object (database, table, sync, etc)
check tables
# bucardo --dbport=5435 list tables
remove table test1 from bucardo list
# bucardo --dbport=5435 remove tables public.test1
check sync
# bucardo --dbport=5435 list sync
remove sync2 from bucardo list
# bucardo --dbport=5435 remove sync sync2
check database group (dbgroup)
# bucardo --dbport=5435 list dbgroup
remove dbgroup2 from bucardo list
# bucardo --dbport=5435 remove dbgroup group2
check relgroup
# bucardo --dbport=5435 list relgroup
remove relgroup2
# bucardo --dbport=5435 remove relgroup relgroup2
check database
# bucardo --dbport=5435 list database
remove master_1 and slave_1 databases
# bucardo --dbport=5435 remove database master_1 slave_1 --force
re-declaration bucardo object to become second master
but before we re-declaration, rename database slave1 to master2 in vb2
postgres=# ALTER DATABASE slave1 RENAME TO master2;
now these step will almost same as PHASE 1 above, but several option will be different.
# bucardo --dbport=5435 add database master_1 dbname=master1 host=192.168.100.94 port=5435
# bucardo --dbport=5435 add database master_2 dbname=master2 host=192.168.100.97 port=5435
# bucardo --dbport=5435 add all tables db=master_1 --relgroup=relgroup2
# bucardo --dbport=5435 add dbgroup group2 master_1:source master_2:source
# bucardo --dbport=5435 add sync sync2 relgroup=relgroup2 dbs=group2 onetimecopy=0
on master_2 we change the role type to source , which is before as a target, also we change onetimecopy=0, because we don’t need to copy anything to master_2, master_1 and master_2 have identical data.
now start the bucardo service (as root):
# bucardo --dbport=5435 startPHASE 3: Testing Multi-Master Replication
we will insert data on master_2 and see if it is being replicate to master_1, and vice versa.
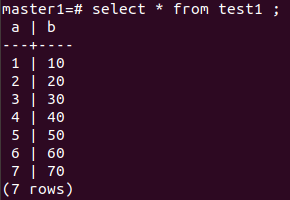
insert data on master_2:
master2=# insert into test1 (a,b) values (6,60),(7,70);check on master_1
insert data on master_1:

check on master_2

as we can see that both server can insert data, and that is one of the example of multi-master replication.
One Comment
Bob Frank
Hi,
Do you need bucardo installed on both servers or just the one server?